Search This Blog

Sunday, 13 May 2018

The Microscopist's mate, part 8 of many.


Just for the record, all of what you find here, and in the other blogs in this series, is now available in fuller detail in my e-book Looking at Small Things.  Go to this link to find out more about how to get the free low-resolution copy, or the cheap high-resolution version: I'm a professional writer, so I like selling books, but I'm also a professional educator, so I like sharing ideas.

There's a similar free or cheap deal on offer for my Playwiths ebook as well, and to see what else I have been doing (LOTS!), go to this link.

You know what they say about ducks, calm, serene and quiet on the surface, paddling like #**@!^ underneath?

Well, that's been me, over the past fortnight, but it's all been worth it.

In one direction, I have just finished going through the the design draft of Australian Backyard Earth Scientist.

Thanks to Jo Karmel's patient editing and Stan Lamond's meticulous design, it now looks and quacks like a book. Or a duck. The bird above, by the way has a name, but  I use the name as my alter ego in another place, so I'm not telling! (What I will tell, is that the National Library of Australia will publish in in January 2019.)  The picture above indicates the likely appearance of the cover, but no guarantees, OK?


But wait, there's more! I have finally worked my way to the end of a guide for K-6 teachers on introducing the gentle art of microscopy in a simple way to young people. You can find it as a PDF by clicking on this link.

Basically, I have looked at all the exciting things you can do with a clip-on magnifier and a device (phone or tablet) to photograph small things. I matched each of these activities to the sloppily drafted pious hopes that make up the National Curriculum.

All of the images (except the one showing the gadget, above) were taken with the Go Micro, and the circle you see is a 9 mm field that you get on a device with no digital zoom.

I did this work as a pro bono for the people who are marketing these Go Micro gadgets: they are a start-up, based on Flinders University. In case you don't know, pro bono is Latin for posh people. As I said, a couple of years back, Latin is a very useful language, at times. Excreta tauri cerbrum vincit.

Back to garnering images, I care about this project because one way into the sciences is by the study of nature, which has absolutely nothing to do with the rubbish my cohort was subjected to in Year 6 under the name "nature study", work that I suspect was mandated by a po-faced and unadventurous pile of stodge, splendiferised by the cognomen 'curriculum'.

No, I want adventures, and here's one I haven't written yet. It is based on the 'skin' or exoskeleton of a huntsman spider, left in my garage after it moulted.

Now huntsman spiders are hard to photograph, because they run around, so I wondered what I could see, and after I looked and found things like the long face on the left, I called this adventure

...do spiders have eyelashes?
First off, I shared one of the images with my older grandchildren, who are 9 and 11, and used to grandpa's odd friends. I headed it: 'A really GRUESOME spider?'

This is really a harmless Australian spider called a huntsman. The circle you see there is about 9 mm across, so it's fairly big.

Well, to be precise, it's only the skin of one. When insects and crabs and spiders and things need to grow, they burst out of their skin. When they do that, there's a soft skin underneath, and they push that soft skin out before it hardens. We call this moulting, but don't worry about that name so much.  The important thing is that the skin sits still for photos.

In the picture, you can see the transparent skin that covered the eyes, lots of whiskers, and also the fangs, which curve around too much for them to be able to bite us. 


I hope you two like it, because at least one species of Australian huntsman spiders is now living in New Zealand.  If you ever watch the movie 'Arachnophobia', you will see the NZ spiders.

Why? Well, it seems the ones that survived in NZ had a "communal habit", meaning they lived together as a group, while the Australian ones prefer to be alone.  If you want mobs of spiders to move together, the New Zealand ones were the best ones to use.


Now, back to my question about the the eyelashes. Today, I started getting adventurous, zooming in by using the built-in digital zoom that comes with most devices, which means losing a bit of clarity.

Still, the bristles that were hard to spot in the first image are now fairly clear.


Here, we can see four of the eyes, but I wasn't finished yet. I zoomed in again, and blow me down, don't those whiskery things look more than a bit like eyelashes?

They aren't eyelashes, of course, but things like that must have evolved for some good reason, and doesn't that look like a nice little question to debate?

Or maybe it sounds more like a future Ph. D. topic? From little things, big things grow, and if those questions have already been solved, there are other huntsman bits to be investigated, like these shots of a palp and some gleaming fangs:


And because the source was a sloughed-off skin, no animals were harmed!

Now back to fitting things to the curriculum, anybody who has seen me in a workshop will know my on-man dialogue:

Me 1: But where dos this fit in the curriculum?

Me 2: In the slot marked Wonder...

Me 1: But there isn't and slot marked Wonder...

Me 2: (grinning wickedly): Then make one!

Oh the things we can think...if we're allowed to.


Wednesday, 2 May 2018

The Microscopist's mate, part 7 of many.


Just for the record, all of what you find here, and in the other blogs in this series, is now available in fuller detail in my e-book Looking at Small Things.  Go to this link to find out more about how to get the free low-resolution copy, or the cheap high-resolution version: I'm a professional writer, so I like selling books, but I'm also a professional educator, so I like sharing ideas.

There's a similar free or cheap deal on offer for my Playwiths ebook as well, and to see what else I have been doing (LOTS!), go to this link.

Announcing: some serious progress!

Links to previous parts: Part 1, Part 2,  Part 3, Part 4, Part 5 and Part 6.

The drought has been due to the fact that I have been producing this guide for teachers, as a pro bono job.

I will, as indicated previously, be expanding this into a book on the arts of microscopy.

You can now see the fruits of my labours, though if you have read the previous six parts, you will have seen some of that already. Anyhow, we have released a draft document: Go Micro: Foundation to Stage 3.

This links interesting activities to the National Curriculum in Science, though there is one to the Maths curriculum as well.

I am an opinionated old secondary (and occasionally tertiary) teacher of matters biological, though when people asked me what I taught, my answer was always a bright "children!".

Over the years, I acquired a healthy distrust of theory, even as I was completing a Master's degree in Education. This work concentrated on measurement, evaluation and curriculum, and I still have a small private practice as a "fixer" of multiple-choice questions, here in NSW.

I became a bureaucrat, specialising in translating good theory into good practice, keeping the Head Office parasites away from the teachers, and that is still my position.

That is why I now, having acquired all of the papers I need to prove that I am retired, spend my time writing beautiful practical books for kids. Most of these relate to science, technology, Australia and history in various combinations.

I write for grownups as well, and I am a volunteer bush regenerator, doubling as the wrangler-of-first-resort for trapped possums, confused echidnas, snakes and redbacks. Venomous, sharp-toothed and spikeful animals are no threat to an old bureaucrat...

Clearly, my life lacks any real excitement, so I am also the 'visiting scientist' at a local primary school in a CSIRO volunteer program. My aim is to get my 500+ charges (Foundation to Year 6 in a bush setting) excited and inspired to go and look for themselves.

When an acquaintance told me about the Go Micro, I saw its possibilities right away, and started playing with the gadget, aided by two grandchildren. It worked, so I suggested using them in class to the primary teacher I work with, but a number of primary teachers advised me that they are required to link things to the National Curriculum.

For readers unfamiliar with the NC, here is a police artist's impression, prepared from the statements offered by the surviving victims.

Reminding the reader of my post-graduate qualifications in this area, the National Curriculum is, in my professional opinion, proof that a camel is a horse designed by a committee, the sort of committee that compares a camel with a horse by taking two camels and sawing the humps off one of them. (A quick nod to Lee J. Cronbach, who crafted that vision.)

The National Curriculum is a horrid, dull, uninspiring farrago that quacks when it should lead, and acts as ballast when it should be providing extra lift. No doubt it means well, but it does harm to the spirit. (I hope, dear reader. that you weren't a part of writing the NC, but I'm a risk-taker, and I warned you that I'm opinionated.  And, you should be ashamed of yourself. So there!)

Many years ago, I was an observer/advisor to the NSW lower secondary science syllabus committee, and I became aware of the problem at Snake Gully Central School (not its real name, for obvious reasons). There, each year, there was one science teacher, and the idiots in Staffing sent out a new first-year-out teacher each year, to be the only science teacher in a small school, with no support, no guidance—and no hope.

In particular, the syllabus was deliberately "non-prescriptive", which meant it offered zero guidance or advice, and young teachers need just that. By mid-year, in three successive years, the new teacher had packed up and gone by the middle of the year, and the principal wrote an impassioned letter asking for a bit of common sense, which outraged the air-headed theorists.

Their theories were fine, but totally unrealistic; their doctrines were unworkable. I watched them, and went away to do what I could to get helpful ideas out there. I still care about turning theory into practice, and buried in the mess of the National Curriculum, there are some useful suggestions.

As a bureaucrat, I lurked in the interstices, and wriggled through the gaps, doing practical things among the inert and the fearful, making life easier for teachers, and so now, as Advanced Middle Age looms, I have set out, once again, to make life easier for teachers. It occurred to me that an old sweat knows the tricks of the trade, and has a duty to share those tricks before falling of the perch.

I am a private citizen, so nobody has to listen to me, and I certainly don't have to listen to the plastic trendoids who wrote the curriculum. So far, the clean draft of my guide is complete, up to Year 6, and I am now tackling Years 7 to 10.

Teachers, I believe that the format covers most of the things you need: if you have any thoughts for improvements or additions, I would welcome them.  I have the time and the equipment to solve most challenges, but don't fear any copyright rubbish if you take one of my basic ideas and do something with it.

The Creative Commons copyright shown on my activities is Attribution, Non-commercial, Share Alike, but as I see it, the format is just a format, and not subject to copyright. Take the framework, and do your own thing!

Use it as you see fit, but if you see an essential aspect that needs to be added, please throw those thoughts to me, so I can do the heavy stuff.

It's time for Stone Soup, people.

Normal service will be resumed shortly.

Monday, 30 April 2018

The Microscopist's Mate, part 6 of many

Just for the record, all of what you find here, and in the other blogs in this series, is now available in fuller detail in my e-book Looking at Small Things.  Go to this link to find out more about how to get the free low-resolution copy, or the cheap high-resolution version: I'm a professional writer, so I like selling books, but I'm also a professional educator, so I like sharing ideas.

There's a similar free or cheap deal on offer for my Playwiths ebook as well, and to see what else I have been doing (LOTS!), go to this link.

(Edit 40/4/2018) Links to previous parts:
Part 1, Part 2,  Part 3, Part 4, Part 5 

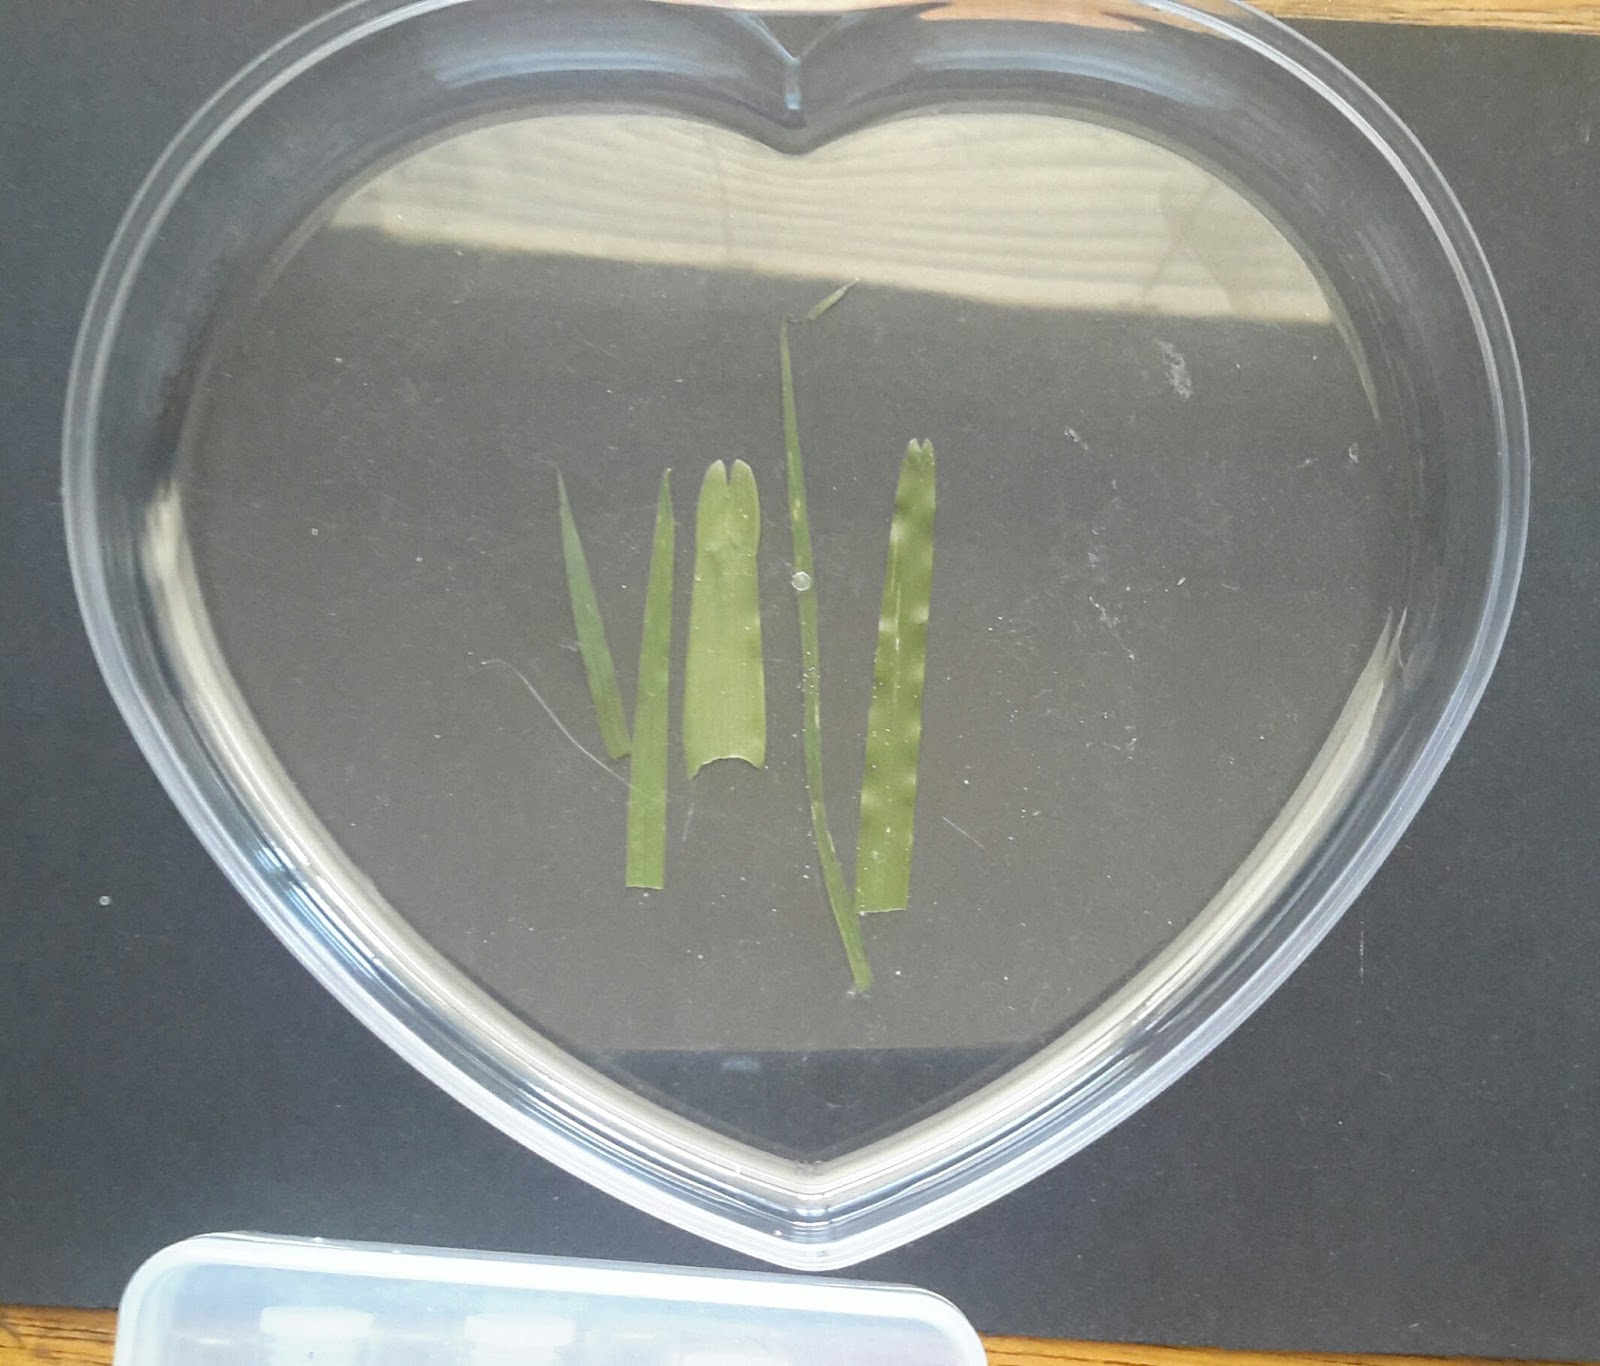
Right now, I am designing activities for young people using the Go Macro, and I have just comprehensively sorted out the focal plane problem. In simple terms, a natural leaf is curved, and that means part of it are out of the shallow focal plane that we are restricted to.

My usual solution is to use a microscope slide, to flatten the leaf out and hold it in the focal plane, but while I have microscope slides to hand, other people may not. Incidentally, the leaf is resisting a bit here, but when I rest the Go Macro lens on it, it flattens down, soon enough.


Once upon a time, things came in little boxes made of cardboard or even wood (like the matchboxes of my youth). Classier things like chocolates came in boxes made of tinplate, and I still carry my specimen tubes in a Barkley Mints tin, which is recent enough to have a barcode on it, or a neat little PVC box that rattles less. That said, the norm, now is transparent polystyrene boxes.

Most of the bits and pieces sitting on my desk are in chocolate boxes of that sort, so the idea of using them jumped into my head:

Notice the box at the bottom: you will see it in use in the next picture:

Maybe you aren't a chocaholic, though, so I cast around for other solutions:

The lid of a CD "crystal case" also works, and so do the polystyrene Petri dishes that I commonly use for the same purpose. Each of these has a small drawback: a small vertical flange, for want of a better term. This stops the base making a firm contact with the table or desk top, bu that is precisely what we want, so the sample lies, flattened, in the focal plane. The answer is simple: slip a microscope slide or a piece of cardboard under the leaf.

Now we are cooking with gas!

Oh, if you want to buy slides or Petri dishes, I have no relationship with these people, but I have had nothing but prompt service from Australian Entomological Supplies. I note that the owner died recently, but it appears that orders are still being processed.

Here are a couple of samples from this morning: I am trying to get good shots of the silica hairs on grass leaves.


Well, I'm still tweaking...

Saturday, 21 April 2018

Mosquitoes and flies

I'm writing like crazy, and the computer starts falling over. I press on, using the MacBook, that starts ruining my back, so I buy a new computer, and now I have to master Win 10, tame it and make it look like Windows 3.1.

I'm almost there. Here's something off the spares pile, OK?

* * * * * * * * * * *
Housefly, stitched together from a dozen or so shots taken at different focal lengths through a monocular microscope. Software of choice was ImageJ which is public domain and free: get it at https://imagej.nih.gov/ij/


High summer sees rainy periods, and soon after, the mosquitoes begin to swarm in our gardens, making people complain.  Around the world, every land seems to claim to have the worst, most bitingest mosquitoes.  So how do Australian ‘mossies’ rank internationally?

Oscar Comettant was a French visitor, who wrote this just over a hundred years ago: ‘In Australia, as everywhere, the mosquitoes sing their irritating “perpetual melody”, an imitation of Wagner.’  I think we may conclude from this that M. Comettant disliked Wagner, rather more than the mosquitoes.

But then Charles Sturt was an early English explorer, who wrote this in about 1830:

‘We . . should have been tolerably comfortable, had not the mosquitoes been so extremely troublesome.  They defied the power of smoke, and annoyed me so much, that, hot as it was, I rolled myself in my boat cloak, and perspired in consequence to such a degree, that my clothes were wet through, and I had to stand at the fire in the morning to dry them.’

Yet Anthony Trollope, writing in 1873, when he was already a well-known novelist, dismissed our mossies as a mere nothing: 

‘And I may add to this that Australian mosquitoes, of which I had heard much and which I feared greatly, were never so venomous to me as mosquitoes have been in other countries, nor are they in force for so large a proportion of the year.  The mosquito of Australia is a poor, impotent and contemptible creature as compared, for instance, with the mosquito of the United States.’

On the other hand, Mrs Louisa Meredith was a Sydney resident in the 1840s, living almost on the site of the Olympics in the year 2000.  She wrote:

‘But worse than [the flies] are the mosquitoes, nearly as numerous, and infinitely more detestable to those for whose luckless bodies they form an attachment, as they do to most new comers; a kind of initiatory compliment which I would gladly dispense with, for most intolerable is the torment they cause in the violent irritation of their mountainous bites.’

It seems that their judgements are all highly subjective, perhaps being related to skin sensitivity.  These days, the mosquito is a minor problem in the cities, for most houses are entirely screened against insects, but they still remain a serious pest out of doors.  Malaria occurs only in the far north of Australia, though global warming may affect that in the future, spreading that disease into major population centres.

In parts of Australia, we need to set up traps for mosquitoes, in order to sample them on a regular basis.  There are a number of very nasty local virus infections spread by mossies, and the traps help us to find out when these diseases are likely to be a problem.

The traps use dry ice (solid CO2) to bring the mosquitoes in close to the trap (mosquitoes fly upwind when they meet a CO2 gradient), then drawing them in with a small electric lamp, as the mosquitoes end their run by looking for infrared (warmth).

This is a nifty way to get close to a mammal, but it may be a problem for the main thesis of Michael Crichton's ‘Jurassic Park’, that mosquitoes in amber are likely to carry dinosaur blood.  Unless Bob Bakker is right, and the dinosaurs were warm-blooded. . ..

In the Riverina area, a single trap may score as many as 7000 mossies in a night.  These are sorted, blended, and tested for viral markers that indicate how serious the danger of viral disease is at any given time.

All of which is by way of an introduction to a bizarre mosquito that I rediscovered with my young son recently, when we dipped a net into a brine pool, and found a huge haul of mosquito wrigglers.  Just one mosquito species lays its eggs in brine pools beside the sea, where the wrigglers thrive, just above the high tide mark.  It appears that only this species, Aedes australis, has this ability.  The trick makes sense, for they have the same advantage as a lone kid in a lolly-shop: all those resources, and nobody to compete with for them!

The brine pools arise from salt spray that drifts and splashes into a hollow, later to evaporate, leaving the salt behind.  In extreme cases, the pools may be encrusted with salt crystals, but even this does not deter these hardy brutes.  I brought some home, to keep in test tubes with different brine concentrations, serially diluted.  The three highest salt levels killed normal wrigglers within an hour, but did nothing at all to A. australis, which even did quite nicely in distilled water.


Thursday, 29 March 2018

Show time

Every town and city of any pretension has its show, but I need to distinguish ‘the show’, which is the Royal Agricultural Society's ‘Easter Show’ from other smaller imitations around the state.  I will say more about the ten-day Easter Show later: first, let's look more closely at the rural show, for most country towns of any size will have one, and these were the fore-runners of the ‘Show’ that everybody knows and loves today.

There is an established circuit for the country shows, and the show folk follow the same route each year, with hoop-las, shooting galleries (if there are prizes to be won, the sights on the rifles will be bent), darts games, mirror maze, hot dog vans, fairy floss (pink spun sugar) machines, and all manner of ‘try your luck’ routines.  And since they only come once a year, there is always a market for their offerings.

These carnival attractions are just the icing on the cake, to use an apt metaphor.  To country folk, the assorted craft competitions are far more important.  They compete to produce the best sponge cakes, iced cakes, plates of cakes, painting (on canvas or on plates), carving, wooden toys, wood turning, flowers of every kind, flower arranging, embroidery, knitting, scones, bread in a variety of forms, giant and gigantic vegetables, jewellery and art metalwork, leather work, pottery, sculpture, bookbinding . . . the list goes on for longer than I can talk.

Then there are the prizes for cut flowers, where the local Dahlia specialist can display all of his (or her) prize blooms, or those that have survived the opposition's sneaking around at night to lob buckets of snails into the specialist's garden.

This is a serious business to the locals, and whole families seek to dominate certain sections in the arts and crafts pavilion.  Outside, others are equally competitive in the pet shows and pony shows, or in the displays of livestock, but in the main ring, something different is going on.  There are organised groups who follow the shows, just to take part in the equestrian events.  For weeks, months even, they follow the circuit, riding their horses in every possible event, and competing with the few local hopefuls who mostly enter only at the lower grades.

The Grand Parade at Sydney's Royal Easter Show.


Depending on the showground, which usually surrounds the local football field, there may also be trotting races, where a horse tows a skeletal gig (hardly more than two light shafts, a seat and two bicycle wheels) around a track.  In a few towns, they may even organise the local picnic races to coincide with the show.

The most spectacular event at the show is always the woodchop events.  The men who enter these ‘races’ have spent their lives working on hardwood, and they have axes which are razor sharp.  The logs they have to chop are usually about a foot (30 cm) through, and they are all seasoned gum.

One type of event involves standing on a length of log, mounted on a metal stand, and chopping through the log, chopping out two V shapes between the axeman's feet.  This simulates the work of cutting a fallen tree into haulable lengths, but the more exciting event simulates actually felling a tree.

The woodchop ring, between heats.
Gum trees usually have a broad buttress at the base, so timber-getters always cut through a tree several metres above ground level.  To get there, they cut into the tree at about shoulder height, insert a plank, swing up onto it, cut a second plank-hole, insert a second plank, clamber up onto that, and so on.  In the show event, the logs are set vertically in the ground, and the wood choppers have to lop off the top section of the log, after they have climbed up to it.


Up the 'tree'.
To make life more interesting, the events are run on a handicap basis, with the ‘gun’ axeman left stranded on the ground, sometimes until the first starter is up in the air, and almost halfway through his log, almost ready to clamber down and re-set the planks to complete the cut from the other side.  This means that the finish is usually very close: it is also spectacular.


Even in ‘the bush’, the life style that is represented in the shows is one that has passed us by.  Timber getters do not chop trees with axes when they can use chain saws and bulldozers to bring the trees down faster, and these days, there are even special chain saw races, cutting three discs from a six-inch length of 18 inch hardwood log.  Horses are only kept so people can learn to perform on them — only the working dogs are as they always were, and I will say more about them some other time.

These days, they'd use s chainsaw...
But however rural life has changed, we conveniently ignore all that at show time, especially at the serious show time when the bush comes to the city for the Royal Easter Show, and the city visits the bush for a day or so.  There are more important things to worry about.

For a parent, survival is what counts at the Easter Show.  In the weeks leading up to the Show, men will discuss it over a beer in the pub, offering each other handy hints.  ‘Take an extra handkerchief’, growls an old veteran.  His younger companion asks if this is to keep off the dust.

The old man is patient.  ‘No, to put through the handles of yer show bags.  The kids want 'em, but they won't carry 'em, and the handles cut yer hand somethin' awful.’  After this long speech, he draws again on his glass.  He has done his share, paid his dues, and if he goes to the show now, it will be on one of the quieter days when the crowds are smaller, and the children fewer.

The young, of course, can survive almost anything.  It is the parents who are under the greatest strain.  First, getting their young ready, into public transport (those who drive to the Show are fools or masochists), then keeping their young together, raising the cash for fast food, carnival rides, sideshows, sample bags and more, finding the lost young, sitting calmly in the police tent, eating ice cream and chatting to the duty police, all of these take their toll.

This, of course, is the time, when the parents will power is under stress, that the young decide they would like a further nasal assault, and demand to be taken to see the animals.  Determinedly, they haul their elders past cattle, pigs, poultry, goats and sheep of many kinds, alpacas, deer, more cattle, through to the areas where small cage birds, cats and dogs are displayed.

On the lawns near the Dog Pavilion, show dogs will be given a last-minute fluff up before they are paraded past the judges who are world-weary cynics, expert themselves in the art of fluffing up, who see discerningly through to the points that will make an animal the ‘best of breed’, or better still, ‘champion of champions’.  In the cattle pavilion, enthusiastic workers steady their cows while they shave their coats to make them look all the more perfect.

This is what the show is all about, for a highly-rated animal at the Royal will command greater fees for its stud performances or litters.  Over in another stall, beef cattle are examined before being slaughtered so the beef can be internally inspected.  Over Show Week, prestigious butchers will display the ribbons won by dead cattle in their windows, telling all and sundry that they have paid over the usual rate to buy highly-regarded meat.

The regions of the state compete against each other with displays of produce, artistically arranged to paint a picture of their region, and the city folk will wander past, giving this scant regard.  On the last night of the show, canny students will gain entry at concession rates, and buy as much of the produce as they can, or they did when I was a canny student . . .


In the main arena, there will be riding displays, races of various sorts, several grand parades when large numbers of animals are led out for a confusing and noisy breath of fresh air, but for children, there are two main attractions: over-priced show food and exorbitantly-priced show bags.

In my youth, a show bag was a sample bag, which came almost for free, and which contained a few  samples, plus promotional items — a ruler with a bank's name on it, or some other ‘useful’ item.  Now a show bag is crammed with cheap toys, recycled comics, and other trivia.  To satisfy consumer legislation, a list of contents and prices must be placed on display, but there seems to be little relationship between the prices shown and any independent assessment of true value.

That does not matter.  The old man in the pub was right when he said to carry a spare handkerchief, for most of the show bags turn out to contain items which are essential to some small person's continuing street credibility, and so they must be bought.  Then with the money all gone, a family can retreat to the ring, to the central arena, to watch the show which is on offer each night.  These usually involve spectacular stunts, but the rodeo events are equally exciting to most.

These events have lost their excitement for me since Henry Cruciform told me about how Crooked Mick rode four bulls at one time.

It's true, you know: Henry never lied.

The Microscopist's Mate, part 5 of many

Just for the record, all of what you find here, and in the other blogs in this series, is now available in fuller detail in my e-book Looking at Small Things.  Go to this link to find out more about how to get the free low-resolution copy, or the cheap high-resolution version: I'm a professional writer, so I like selling books, but I'm also a professional educator, so I like sharing ideas.

There's a similar free or cheap deal on offer for my Playwiths ebook as well, and to see what else I have been doing (LOTS!), go to this link.


Here are the links to Part 1, Part 2, Part 3 and Part 4.

Sorry about the delay, but I have been busy having fun, like this study, where I was looking at stomates, the little pores on leaves that plants breathe through, and which you can see above. Now I have started writing up.


You need some suitable leaves, clear nail polish, clear sticky tape, a piece of glass like a microscope slide, a device and a Go Micro.

Risks and dangers: Spillage or sniffing of the nail varnish. If you have never mentioned Material Safety Data Sheets before,  search on <MSDS acetone>. Microscope slides are fragile, and cuts are possible.

Stomates (or stomata) are pores that are mainly found in the lower surfaces of leaves, and they let carbon dioxide in and oxygen out. They also let water vapour escape, so plants need to control their stomates, which are very tiny. One of the best is a common garden plant with purple leaves, known as Tradescantia pallida.

Old botanists say it has large and clear stomates, ones that can be seen with a 30x hand lens. The stems break off easily, and when pushed into the ground, they take root.

This is what the plant looks like.
The flowers of Tradescantia pallida.
The lower surface of most leaves will be rich in stomates, and while they require a good microscope to see them well, we can take a cast of a leaf surface and look at that. All you need is some clear nail polish, some sticky tape, a microscope slide and a way to light the slide from below.

Stomates are very small, about 0.05 mm (1/20 mm) across, so you won’t see them with the naked eye, but once you know what you are looking for, you can see them with a good hand lens, just as closely-packed dots. The cast, by the way, is usually called “a peel”, and in my youth, they were made with stuff called collodion.

Now, there’s a simpler way, but I will take you through some of my steps, including some false ones.

Choose a leaf: most leaves work, but ones without hairs on their lower surface are probably best, and if you can find that purple Tradescantia anywhere, get a leaf of that.

Then, using a small amount of clear nail polish, paint a thin layer on the lower surface, no more than 1 cm wide and 3 cm long (size isn’t really important). Leave this to dry for about 10 minutes, then press a strip of clear sticky tape down over the nail polish. I used ivy first, then a Camellia and a bay leaf. 

It is worth noting in passing that with a bit of effort, you can break a Camellia leaf in the same way as breaking a piece of onion (I'll get to that some other time), to yield a small scrap of real epithelium, the leaf’s surface layer.

The bay leaf was better. Those tiny dots are stomates, and the first picture below is like the unconvincing view from a hand lens, taken through the Go Micro with no digital zoom.


The next one is at full digital zoom with the Go Micro: this is a bit more convincing!


So you can see these stomates with the Go Micro, but to show you what is visible with a professional level microscope, there is a shot on the next page of a peel from a bay leaf, taken at x100, though the lower right inset is at x400. Once you see this, the lower magnification views will make sense. Each stomate looks like two fat sausages (the guard cells) lying side by side: when they curve around, the stomatal pore opens and gases go in and out.


Two views of a peel from the lower surface of a bay leaf, at x100 and x400 (inset).

As I said, the best plant (and certainly the best I have found so far) for this exercise is Tradesacantia pallida, a purple garden favourite with purple leaves, and one that grows easily from cuttings. Here is what you can see with the 60x at two magnifications:

Stomates of Tradescantia pallida, seen with the 60x.


The rig for this: the slide sat on jar with a light source and a diffusing film, my phone sat on top of the two boxes and the lens rested on the microscope slide.


The same slide, seen through a high-end microscope, at 40x, 100x and 400x

Each stomate is made up of two guard cells: these are the “lips” of the “mouth”, but in Tradescantia pallida, there are two other cells, one at each end, making a rectangle. It is important to note this, because it turns out that you can see the stomates on the plant’s actual leaf with the Go Micro, if you know what you are doing! The next two shots are looking at the actual leaf surface, with the gadget.


This view is looking at the leaf itself, with reflected light. The stomates are the pale square shapes.


Here, the stomates are very visible at x60, but you can even see them, once you know what you are looking for, with a 10x handlens. I think that’s neat!


Thursday, 22 March 2018

Penguins

Penguins always fascinate, waddling on land, flying gracefully under the water, and my son's young friend  was rather awe-struck when I told him there are live penguins in Sydney Harbour.  They nest near his home, hiding under rock shelves on the shore, and hissing if you approach them on land.  Their breath stinks of fish, and they are clumsy on the land, but they are delightfully graceful ‘flyers’ under the water.  But you have to know where to look for them, and what to look for.

A fairy penguin is also called a ‘little penguin’, but not around Sydney.  We see the occasional rockhopper and fiordland penguin here, but fairy penguins are our common ones.  As a boy, I used to try chasing penguins in a dinghy, but it was impossible, they were just too fast.  On land, it is another matter, and now penguins can only nest where the feral cats and foxes cannot get to them.

Last time I was at Taronga Zoo, the zoo penguins were being herded into an enclosure for the night as we left, to make them safe from the zoo's feral foxes. The ones on the coasts around Manly are guarded by volunteers.

Their name is Welsh (pen = head, gwyn = white), but this puzzles me, for penguins never go north of the equator.  Recently, somebody told me that the original penguin is the auk of the Atlantic.  But while the name comes from the Welsh for ‘white head’, all penguins have black heads.  The auks are real ‘penguins’, for the guillemot has a whiter head in summer, the puffin (very Welsh, that one) is almost entirely made up of a white face.

Another puzzle: why do so many penguins have flashes of yellow to offset the severe black-and-white patterning? The black and white pattern would make them less visible to predators, but yellow makes no sense at all.  It must be their resemblance to waiters that makes them so attractive, and I find it interesting that cartoony penguins never show any signs of yellow at all.

Our Eudyptula minor is the smallest of them all, found only in southern Australia and New Zealand.  They weigh about 1 kilo (2.2 pounds) and stand 30 cm high.  They are dark blue to black on the upper body and white on the lower part.

The Australian sub-species is distinguished from the New Zealand ones by having a margin of white feathers on the tail and on the rear edge of each flipper, though penguin experts can be easily persuaded to brawl about just how many species and sub-species there are.

Fairy penguins come ashore after dark, showing their infinite variety of calls, ranging from guttural growls to loud screams and noisy trumpeting.  They live for about 7 years and some keep the same mate for life.  They lay two white eggs in spring, the male and female share incubation, and the chicks are helpless for 2-3 weeks after hatching, needing brooding.

After that time, both parents leave the nest to collect food.  By 8 weeks, the chicks have lost their down and grown waterproof plumage that they need to go to sea themselves.  They mainly hunt schooling fish and squid in surface waters.

They can see both above and below water (not an easy trick!), there is no external ear visible, but they communicate a lot by sound, the flippers are NOT waterproof, the feet are webbed with three claws, and there is an oil gland above the base of the tail.  Without this, they would not be waterproof.

The gland produces liquid waxes (honest!) when massaged with the beak.  The adult birds undergo an annual moult in late summer when they change over all their plumage, and this keeps them on shore for two or three weeks, while they live on fat reserves, sometimes dropping to half their starting weight.

Most people compare penguins to waiters in evening dress, but I relate more to the Antarctic ones which leap up out of the sea onto the ice as they come ashore.  When they are ready to go out to sea again, these penguins all wait on the edge of the ice for somebody else to go first, fearing the leopard seals that are lurking beneath the ice floe.

In my many years of work as a bureaucrat, that image of the penguins standing, shuffling and jostling, was constantly with me, though I could never explain why.

They were just, I would say, going with the floe, and getting cold feet — and that is why bureaucracies fail, at least until a few surrealist anarchists land among them.

Friday, 23 February 2018

The Microscopist's Mate, part 4 of many

Just for the record, all of what you find here, and in the other blogs in this series, is now available in fuller detail in my e-book Looking at Small Things.  Go to this link to find out more about how to get the free low-resolution copy, or the cheap high-resolution version: I'm a professional writer, so I like selling books, but I'm also a professional educator, so I like sharing ideas.

There's a similar free or cheap deal on offer for my Playwiths ebook as well, and to see what else I have been doing (LOTS!), go to this link.

Here are the links to Part 1, Part 2 and Part 3.

This time, we are looking at coins and notes. Under magnification, most coins show scratches, most notes show fine engraving. Take a close look at this coin, which any Australian will recognise.

A reader who looks at any of my science-related books will be familiar with the coin as well, because I use the Australian 50-cent coin as a standard scale. The coin is 32 mm from side to side, and my reasoning is that in my lifetime, this coin is likely to remain in circulation.

That is why the 50-cent coin appears all over the place here, with redback spiders crawling over it, or lying beside a fossil or a rock. (See here, for redbacks and coins.)

Puzzle your friends

Now take a look at this image on the left: do you recognise it? I came across it, and even though it was a shot I had taken with the Go Micro device, I had to check where it came from.


Find this part on a 50-cent coin and take your own photo: see if your friends know what it is. Or of you prefer, choose some other coin and try it out.

Coin details

Then try some of the other Australian coins, and here, you need a couple of new words: the side of the coin that we call “heads” is actually the obverse to coin collectors, while the “tails” side is the reverse. You also need to know that the details are easier to see on a shiny new coin.

Can you find the initials of Stuart Devlin who designed the reverse of the 5, 10, 20 and 50 cent coins? Can you find two (or more?) different sets of initials for the different designers of the head of Queen Elizabeth II on our coins? Can you work out when the design changed?

No, I don’t know who those people are: see if you can find out. I only know of two, but look at some older coins, once you know where to look.

Over time, coins get scratched, and obviously older coins are more scratched, on average. But out of our “gold” coins and our “silver” coins, which ones seem to be more scratched?
 

Looking at notes

Here are three images taken with the Go Micro from the new Australian $5 note: would you recognise any of them? The third one might be a give-away, but the others aren’t that easy.

   
Now here are five Go Micro shots of parts of the new Australian $10 note: once again, the last one is the give-away.


If you can find an old Australian penny, KG was George Kruger Grey (not “kangaroo”, as I used to think).

HP who designed King George VI (pre-1953) was Herbert Paget.

Guess who was quite a keen numismatist, back in those days?


Ah, yes, I said it would be green slime, didn't I?
Well, the cultures are still maturing... i will get there, one of these days.

Sunday, 18 February 2018

The Microscopist's Mate, part 3 of many

Just for the record, all of what you find here, and in the other blogs in this series, is now available in fuller detail in my e-book Looking at Small Things.  Go to this link to find out more about how to get the free low-resolution copy, or the cheap high-resolution version: I'm a professional writer, so I like selling books, but I'm also a professional educator, so I like sharing ideas.

There's a similar free or cheap deal on offer for my Playwiths ebook as well, and to see what else I have been doing (LOTS!), go to this link.

Here are the links to Part 1 and Part 2.

Today, I will be talking about a neat little trick for lighting, not the green slime I said I would be on about. What I actually write about here depends on what I am working on, and yesterday, I had an idea.

There are going to be times when you want to shine a light through a specimen, especially when they are looking at slide mounts. I have messed with a few rigs, and I will be building a more sturdy one, one of these days, but here’s a quick and dirty version.

The good thing about quick and dirty versions is that you get the wrong steps thrown in as well, because that detail will help you make a better model for yourself. here's how I started this adventure, by gathering the items below:

What you need: a jar, a headlamp with LEDs, scissors, and some translucent plastic cut from a milk bottle.
 After I took this shot, I added sticky tape to the list. I used a 400 gram jar, because you can sit a microscope slide on top. These next four pictures tell the story.


I realised as soon as I tried this out that the camera microscope was focusing on roughness in the plastic, so I replaced the plastic with a piece of tracing paper and stuck that to the jar.

In my final version, I plan to have the diffusion layer (the plastic) 2 cm below the slide, but for now, I am using this arrangement to steady the camera.

Remember that one of my major concerns will always be camera shake. The Go Micro clip-on is resting on a microscope slide that is across the jar. It’s primitive, but it works!

The first rule of gadgeteering, though, is never to give up while you are ahead. The next morning, I spied one of those clear plastic throw-away containers that, typically in our house, had not been thrown away, but been used to store something important, like pieces of string too short to be of any use. Anyhow, it was pressed into operation, but an image of the base showed through:


I could work around that, but  I went straight to Mark III, seen in the second and third shots. This one uses a square flexible plastic box that is just sturdy enough.

 And here is how it looks when i light the head lamp:

The thing is, though, that the morning I did this, I had some sand samples that were dry enough to look at, and for most purposes, you don’t want back-lighting on sand (yes, I have some plans to work with crossed polarisers later, but this is now). So needing a light from above, I reached for the original Mark I and a bit of black cardboard, and took these next two shots.


I could have done without the slide here, just laying the sand on the cardboard, but I had something else in mind. Using the paint brush, I spread the sand out and got the shot below, a 9 mm diameter field of shoreline sand taken from St Heliers Bay in New Zealand.


I am conservative about the biosecurity of specimens like this, so even though marine sand is not an import that must be declared, all my samples were both microwaved and baked in an oven before they came anywhere near Australia. Sand from freshwater lakes, on the other hand, must be declared, but my interests are fully taken up with marine sand.

Anyhow, that has solved most of my present lighting problems, and I hope it has helped with yours!

Maybe next time, it will be green slime time, but then again, it might be sand or pill bugs, which used to be sold as a cure for all sorts of ills.