
Butterfly and moth wings have no colours in them—or at least there are no pigments. The scales on the wings produce the effect of colour because of the way they catch the light and bend it. If you want to look it up, the process is called birefringence. Even though you will probably want the higher magnification of a monocular microscope, you may need to use reflected light to see any detail.
That is, you may want to try using a bright light above the stage, though the shots above were taken with my good monocular microscope, and at the magnifications marked.

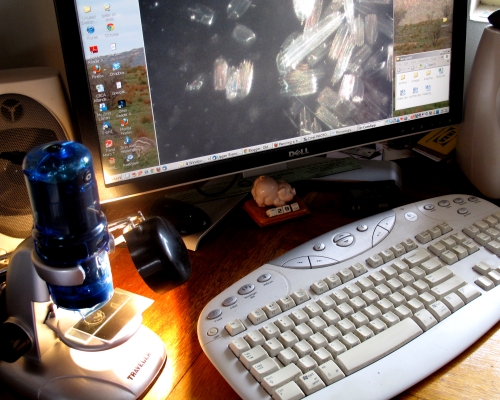
Anyhow, here's what you need, snapped on the desk where I am now working. You need a microscope (out of shot), slides, cover slips, a piece of black paper, microscopy tools, and one or more dead moths and butterflies.
The best place to collect dead moths is in an exterior light fitting that is on at night.
You need then to scrape some off, add water and make a wet mount of them.
This is easy to say, but harder to do, because sometimes the scales repel water and slide out from under the cover slip. In the end, I took a dead moth, snipped a few pieces of its wing and dropped them into a small specimen tube with a few drops of water and a tiny amount of detergent. This is why the first shot features an annoying air bubble in each magnification. Like life, microscopy often involves trade-offs.

 Here are three shots of the main parts of the process of making a slide. I added a bit much water, so I then had to blot the excess away with a face tissue. By the way, I used the black paper for contrast, so I could see the scales on the slide. It's a handy trick to remember.
The slide in these shots gives you a scale of sorts, because it is 25 mm (one inch) from top to bottom.
These three shots were all taken with the $50 USB microscope which will appear later in this entry.
 The first one is at x10, the sort of magnification you get from a normal hand lens, and as you can see, it isn't much use.
Now we are at x60, and like the first shot, this is using transmitted light, which means I have turned on the light under the stage. Now we can actually see some detail.

Let's move up to x200, the maximum that I can get. It's a bit pale, and the focus control on the cheap microscope leaves a lot to be desired, but hey, what do you want for 50 bucks?
 The lower shot is one of the pictures I took, but I don't think I'm really in control of this method yet. Anyhow, play with it!
Now a note about my first way of getting the scales from the moth's wing: I think the method shown here, where I just rubbed the scales off with a pair if forceps worked best,
I used scissors to cut bits from a wing.
I used the handle of a paint brush to treat the wing pieces roughly, before I fished out the main pieces of wing. Then I stirred the water up a bit and lifted a drop of it to make my slide.
There were only a few scales on the slide, and some of those were broken, but there were enough whole scales to study.
One thing I learned: the scales seem to vary in any one moth, but I don't know whether each type makes a different colour. There's an interesting bit of research for somebody there!
No comments:
Post a Comment